|
| |
What is a sculpted surface, why would I make one, and how?
A sculpted surface is more than an extrusion (an extrusion has walls which are
parallel), it can vary along it's length. There are essentially two parts, a Spine (i.e
like a backbone), and a cross section (or many cross sections) stacked along that spine.
Visualize this... three cross sections; a capital O, a little o, and a . (period or dot).
Now if I stacked them up, and joined them with a "wall" along the sides, you
might imagine that we would make a cone. And here we will.
- Fire up Flux Studio and select the sculpted surface icon (looks sorta like a squished and
bent box).
- Then click into the viewing window to "place" the sculpted surface into the
viewing window.
- You will see that a new window, the cross section window pops up, there is also a
palette of tools which allow you to add, remove, and move points.
- I prefer to work with a grid turned on, so I hit the grid icon to do so.
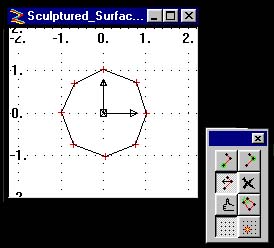
- By default, you are in the "add points to the end of the line" mode so click
in the cross section window and start adding points around in a circle.
If it does not look much like a circle, you can select the "move
points" icon to reposition certain points, you can also use the "insert"
icon to add additional points wherever you feel that you need them. NOTE: This is a
tutorial, it does not have to be perfect, just good enough to get the idea, don't use more
than eight or ten points. Here is my simple big "O"
- OK, if I hit the "thumbs-up" icon, then I will see that I have made an eight
sided tube of sorts. Since I want something more cone like, I double click on the object I
made in order to open up the properties panel for the sculpted surface.
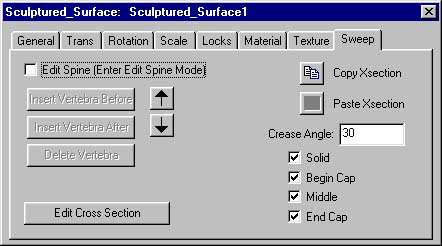
- OK, Here I need to do two things, 1) check the Edit Spine checkbox and 2) hit Edit Cross
Section button. When you check Edit Spine, you may notice that the solid object in the
viewing window turns to "wire-frame" outlines. You can use the Up/Down arrows to
make the cross section that you want to edit active. So here is an example of my little
"o" cross section.
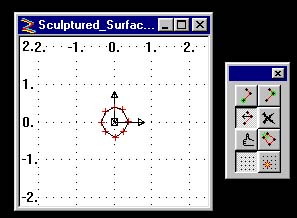
- If you hit the "thumbs-up" icon, and look in the viewing window, you will see
something much more cone like, if you then hit the "insert vertebra after"
button, you will add a third vertebra to the sculpted surface. Do this and edit the third
cross section to make the circle even smaller. You can zoom in on it so you can see what
you are doing better. Hit the "thumbs-up" icon.
- OK, for review we just made three cross section sorta O shaped, big, little, and tiny.
We see something like a cone. We know that we can use the Up/Down arrows on the sculpted
object property panel to switch which cross section is the one we are actively working on.
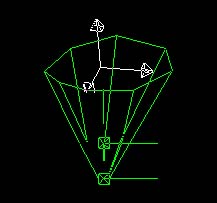
- But, did you know that we can click and drag the active cross section in the viewing
window to make the shape look nicer? Well you can, try it.
 adjusted cone
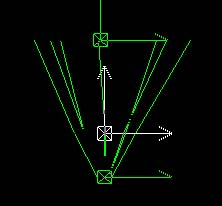
- OK, now that you know how to create cross sections and move them about, it might occur
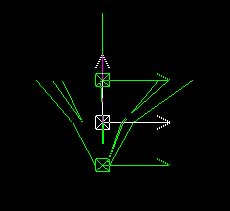
to you that the individual cross sections can be rotated as well. They can be.
- Make the cross section that you want to rotate "active" by using the Up/Down
arrows, in this case let's tilt the biggest part of the cone some. Click on the rotate tab
at the top of the sculpted surface properties panel, then click in the viewing window and
drag to tilt the active surface. Maybe it will end up looking like this...
 If
you uncheck the Edit Spine Button: If
you uncheck the Edit Spine Button: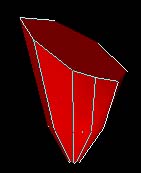
- OK Mr. Phillip, why would I want to do this? Well, it is handy if you want to make a
hose, or a tail on a creature, or even a long flowing robe for a Jedi Priest. Once you
master the basic technique, you will find you can make any thing your heart desires. For
example, I used sculpted surfaces for a hose on my Hookah, and for the robe on one of my
first avatars.
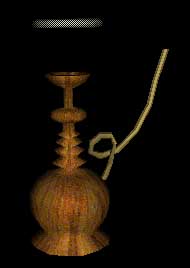
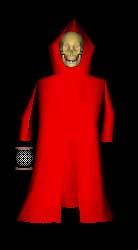
On the Hookah hose, I used a sculpted surface that was all one diameter, but I tilted or
rotated many of the cross sections in order to make the hose bend around. On the
"Spook", I used several "open" cross sections, so you could see inside
the robe.
|
